The BellCommander Windows Service client is also available with an MSI installer to make installation and management easier using Windows group policy. The files for the MSI installer are available below:
Click here to download the Windows Service Client MSI file
Click here to download the sample Windows Service Client MST file
Installing the Windows Service Client using the MSI Installer:
Enable PC Clients in BellCommander:
1. Start the BellCommander server software through the Windows Start Button (select All Programs, BellCommander folder, and BellCommander icon).
2. Click the Devices button.
3. Select “Client PCs” from the Device Type dropdown and check the box to enable Client PCs.
Update MST Settings:
1. Use a tool for editing MST files, such as Microsoft Orca. Microsoft Orca is included in the Windows platform SDK. For Orca, follow the steps below:
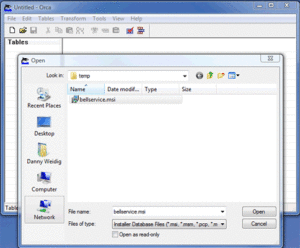
a. Open Microsoft Orca. Select File|Open from the Orca menu and open the bellservice.msi file:
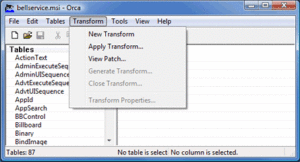
b. Select Transform|Apply Transform… from the Orca menu. If the Apply Transform window, select the bellservice.mst file.
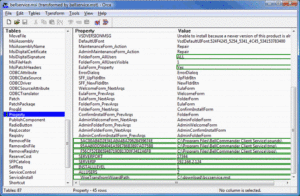
c. Locate the “Property” table in the Tables list on the left panel. Change ServerIP on the right-side to the BellCommander server’s IP address:
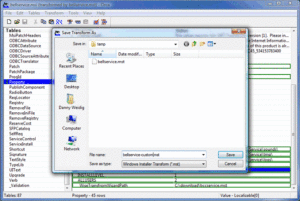
d. Select Transform|Generate Transform from the Orca menu bar. Enter a file name for the saved file. For example, bellservice-custom.mst:
Install BellCommander Client Service:
Install bellservice.msi with the updated transforms (MST) file using the command below. /qn option will make install silent.
bellservice.msi transforms=bellservice-custom.mst /qn
Uninstall BellCommander Client Service:
If BellCommander Client Service needs to be uninstalled, run the following command:
msiexec /uninstall bellservice.msi /qn
